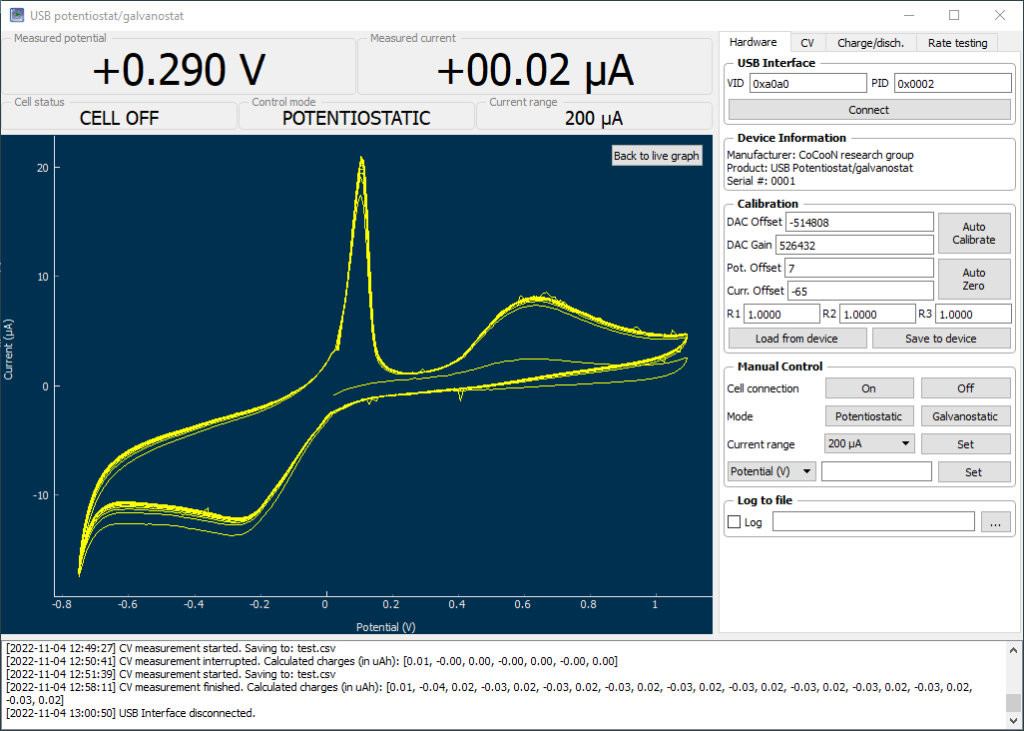
With my DIY potentiostat/galvanostat, I can perform many types of experiments. One of the most useful – especially for its link to battery chemistry – is the cyclic voltammetry (CV). In a CV experiment, the potential between a working and reference electrode is changed within a range and the current at each potential measured. The shape of the plot measured, gives important information about the chemistry in the solution. You can tell if anything is oxidized or reduced, at which potentials these processes happen and you can also get an idea about the reversibility of the reactions taking place.

A CV setup has several components. The experiment is carried out in an electrochemical cell, which is a glass vessel that can hold all of the electrodes in place, without any risk of the electrodes ever touching each other and causing a short. Although such setups can be built at home, relatively low cost high quality solutions are indeed available.
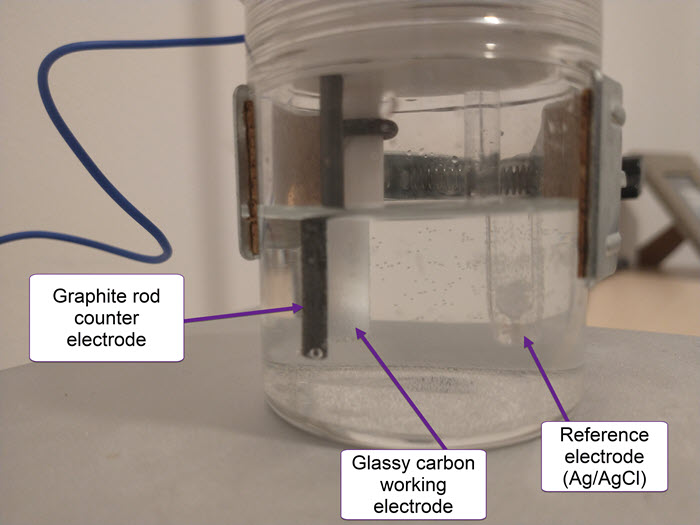
The cell has a three electrode setup. The first is the working electrode (WE) which is the electrode where the relevant electrochemical processes will happen. This electrode is usually made of an inert material – glassy carbon, platinum and gold are most common – with a high polish and a limited surface area. This is because we want the surface of the electrode to be reproducible and to always provide us with the same measurements.

The reference electrode (RE) provides us with a potential based on a chemical reaction that is always happening at a very defined potential. For best results, these are usually 1 electron reactions that happen at a very small scale – which means a current draw below pico amps – and normally involve an equilibrium with an insoluble solid. Popular choices are calomel and Ag/AgCl electrodes.
Finally the counter electrode (CE) is the electrode that is connected to ground and has a polarity opposite to that of the working electrode. It is meant to complete the circuit. This is generally made of an inert material and should have a very high surface area compared with the WE, such that reactions are never limited by it. Popular material choices are graphite rods and palladium and platinum wires.

Although the above might all sound complex and expensive – I got quotes of over 1000 EUR for the above with some EU supplier companies – I was able to find everything on ebay for relatively low prices from Chinese suppliers:
- High purity graphite rod CE (3mmx95mm)
- Professional 112 Type silver chloride reference electrode (Ag/AgCl)
- Sealed electrolytic cell (C001)
- Glassy carbon WE (3mm)
The total price for the entire setup including shipping – not counting the DIY potentiostat – was around 162 USD. I am very satisfied with the quality of all the components that I have received. I have also successfully performed my first CV experiment (showed above).
My first idea with this CV setup is to explore manganese chemistry and measure the reversibility of Mn2+ oxidation reactions in concentrated sulfuric acid solutions. Highly reversible Mn+2/M+3 reactions are very important for Mn based flow batteries.
Pingback: Towards a DIY Manganese/Iron flow battery. First experiments using cyclic voltammetry. | Chemisting
I am struggling to build my Own potentiostat/galvanostat for metal corrosion measurement. I have one expert of electronics who does not understand chemistry and I am an expert of chemistry. So I need your help how to start the project. Please assist me on the following;
The software you have used where to find?
What are electrical components you have used?
How to connect them building a circuit?
I hope after building the one like yours I can start moving to my target.
Thanks in advance
I used the information in this paper https://www.sciencedirect.com/science/article/pii/S2468067217300317, the paper contains the software, electrical components and circuit diagrams needed.
I have followed your work with interest for years. You mentioned purchasing a completed pcb from China. I did not understand if you provided the components or just the design specs. I’m considering retracing your steps. Thank you for your guidance.
I provided the specs from a published research paper, they did all the assembly.
I am prof. from Fırat university. We manufactured this card. Now we test it to measure IV charactrristics of a resistor and got a jump on IV curve of resistor. Could you help to ıs how can we solve this jump.
Thanks